- Home
- C++ with Qt Tutorial
- Introduction to Qt Creator
Learn C++ with Qt, Part 001: Introduction to Qt Creator
After having installed the C++ development tools and the Qt libary and development environment in the first part of my C++ programming tutorial, let's continue with a more detailed look at the Qt Creator development environment. Most of the programming during the rest of this programming tutorial will require the use of the Qt Creator programming environment.
Once you start the Qt Creator program, you can see the following elements inside the program's window:
If you already have some experience with development environments, you might skip this part of the tutorial and jump right to the next part. I will explain the use of the different parts of the Qt Creator as we need them.
However, the Qt IDE has a slightly different structure compared to toher IDEs. Looking at some details here gives you a better idea where to find what function and how to use it.
Qt Creator IDE overview
The Qt Creator integrated development environment has a very simple and clean layout in comparison to other development environments. Yet all tools of the SDK can be used from within this application.
Qt Welcome page
The welcome page of Qt Creator should automatically be displayed if you start the application for the first time. If it is not displayed, then you can bring it up by clicking on the "Qt Welcome" icon on the left side of the main window.
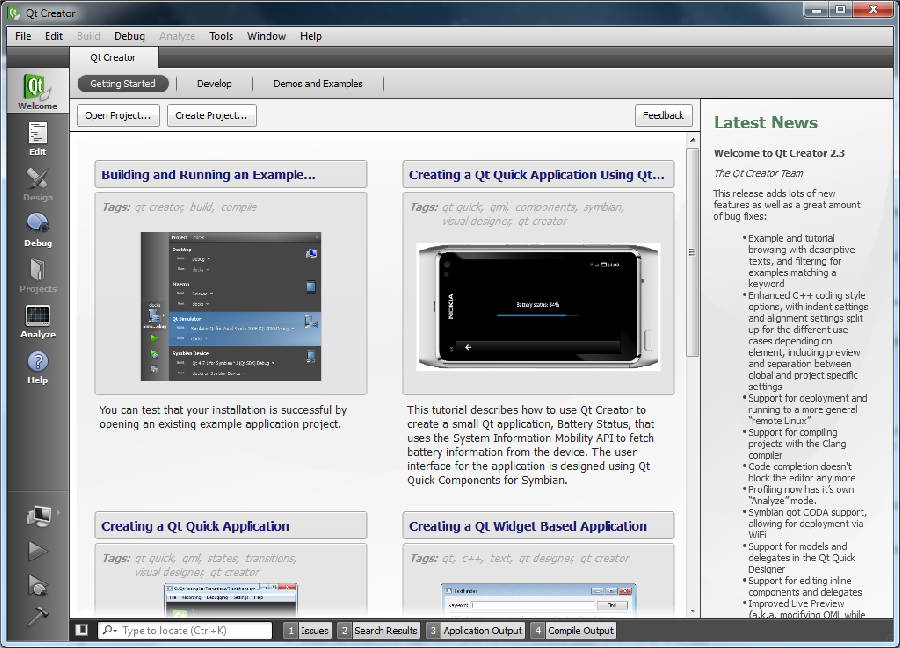
On the welcome page you are offered several options. I am going to explain them a little further down in this article.
The Qt Creator menu bar
On the top of the main window, you find a menu bar just like in every other kind of application:

Just like in other applications, the different menu entries are automatically activated or deactivated depending on the current state of the application, e.g. if you are editing a source code file or creating a new project file:
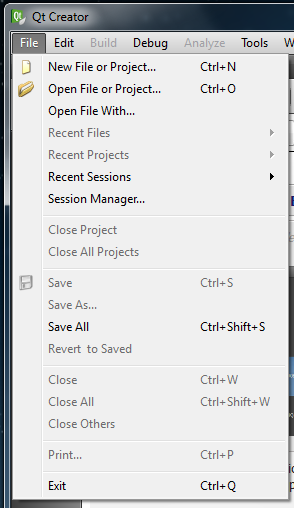
As expected, the "File" menu contains all file-related operations.
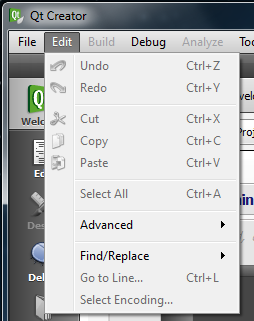
After the file menu you can see the "Edit" menu. The edit menu contains all options for editing the source code of your program:
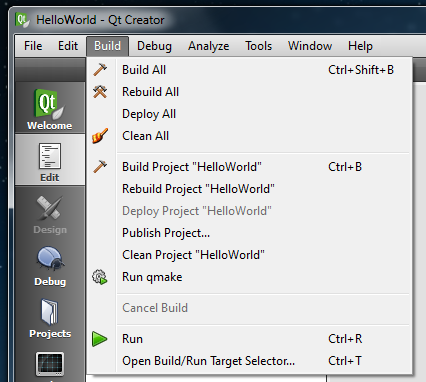
The "Build" menu is typical for a development environment. Here you get several options which can turn your source code into an executable file (or several files) for testing or into a final, stand-alone application that can also be used on different computers:
The "Debug" menu is also a standard asset in a software development environment:
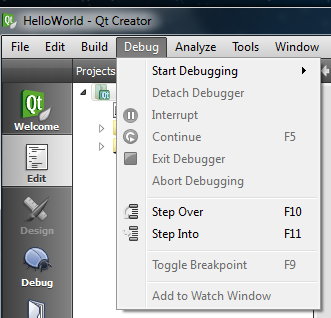
Here you get different options which control the debugger program. This is used to analyze and find logical errors in your program which are not detected by compiler or linker tools.
Next up is the "Tools" menu:
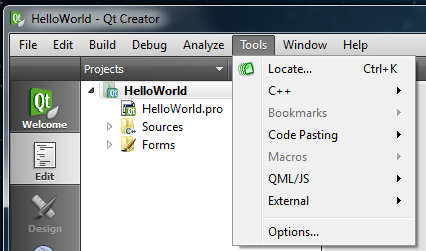
In the tools menu you can find the central options at the end of the list. Other tool options present here include the following:
- creation and management of code "snippets" (short, frequently used blocks of code)
- text search in code files with the "locate" search tool
- external text translation tools (Qt Linguist)
- external code management and version control tools (Mercurial and Git)
After the tools menu, there is a "Window" menu:
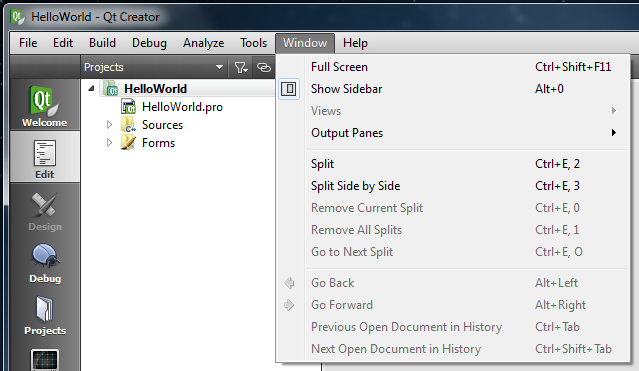
The window menu contains all options for the window management and navigation within all windows inside of the Qt Creator IDE.
The last menu in the main menu bar of the Qt Creator application is the "Help" menu:
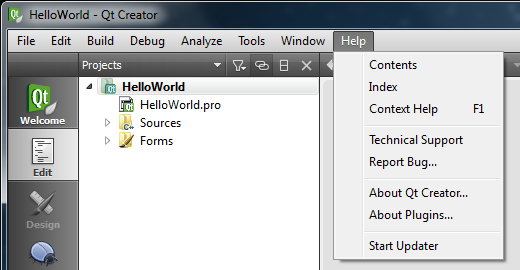
The help menu contains different online help options, links to information about the Qt Creator application and plug-ins and a link to the updater application. The updater application is used to manage and update all components of the Qt SDK.
Mode and action icon column (left side)
Below the main menu bar, the main window of the Qt Creator IDE contains a column with some icons, sometimes with additional text:

With the icons in the upper area of the column inside the main window you can switch between different modes of the development environment:
- Qt Welcome page
- Edit environment (edit mode)
- Design environment (design mode, for graphical user interfaces)
- Debug environment (debug mode)
- Project management (project mode)
- additional online help (help mode)
The lower part of the icon bar contains icons which allow you to start, debug or build your own application from the currently selected project. These icons are only activated once you are working on a development project.
The first icon showing the computer monitor and external disk drive is the project icon:
Clicking on this brings up a small window with the name of the currently selected project on top. If you have opened more than one project file, you can switch between the projects using a pop-up list in the project name field. Below in the same window you can see the currently set options for building running the project. If more than one C++ development environment has been installed before, you can choose which one should be used to build your project.
Below the project icon there is a simple green triangle:
This icon is used to start the program you are currently working on. If necessary, the program is automatically compiled and linked before it is launched.
Underneath the run button you find a second green triangle button, this time with the added picture of a bug:
With this you can start your program in debug mode. The debugger is automatically started together with your program, allowing you to analyze your program during runtime.
The last button in the action icon bar on the left shows a hammer:
This represents the build option. Once your program works as you want it to, you can create the final, stand-alone program using this function.
The main window
Apart from the icon bar on the left side, most of the Qt Creator window is made up of a view which changes depending on the currently selected part of Qt Creator.
Qt Welcome screen
When you open Qt Creator the first time, the Qt Welcome screen is automatically displayed in the main window area. You can always get back here later by selecting the "QtWelcome" button on the left.
On the right side of the Welcome page you can see a column where news about Qt is displayed. This is automatically updated if you have an active internet connection.
In the welcome view you can currently choose between three options using the appropriately labeled buttons:
- Getting Started
- Develop
- Demos and Examples
The "Getting Started" page is automatically displayed first. You can call up some basic documentation and online tutorials here, as well as choose from different programming examples:
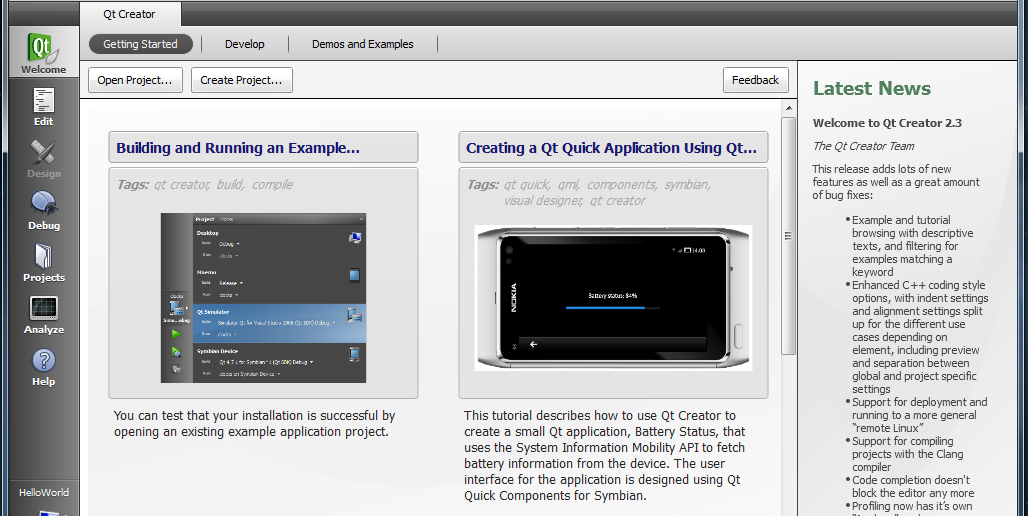
The additional buttons for opening or creating a project do the same thing as the similar menu entries in the file menu, namely opening existing projects or creating a new project. With the "Feedback" button you can also send the Qt developers some feedback on your experiences or problems with the Qt development environment.
The second part of the welcome view is the "Develop" page. Here you can see a list with the recently opened projects on the right and a list for recently used "sessions" on the left:

While the projects contain all the files used for the development of an applications and the relevant build options, sessions can store info on all currently opened projects and files as well as currently set debugging options (together with things like breakpoints etc.). You can set a stored session to be automatically reopened on the next start of QtCreator by using the appropriate option in the "Manage Sessions" window.
The third part of the welcome view is the "Demos and Examples" page:
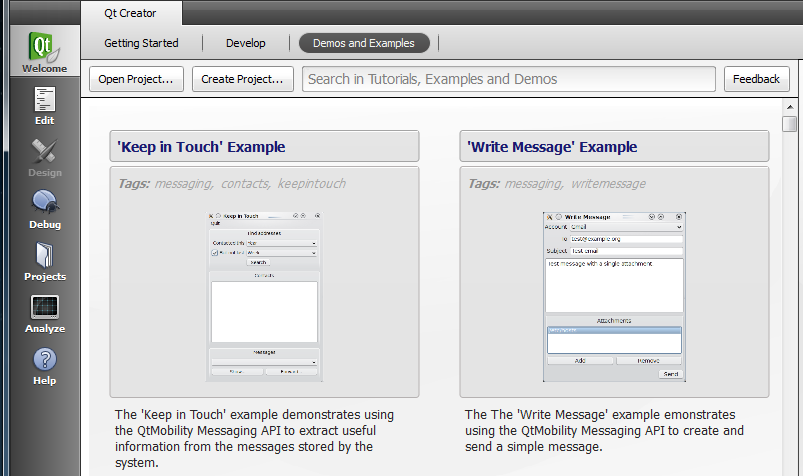
This area contains several demos and example projects to choose from. Each entry here comes with some additional documentation on the features of the demo or the functionality and aim of the project.
These examples show you how to implement certain features which the Qt library offers inside of working programs, making it easier for you to use these features in your own programs.
The different modes in Qt Creator
Within the main window area in Qt Creator, the central work area allows you to edit the different parts of your current programming project.
The editing area has different "modes" for viewing and editing different aspects of your program, each with their own look, which can be accessed by clicking on the icons in the upper part of the left column in Qt Creator:
The Edit mode
Once a file or project has been loaded or created, the files can be edited in the edit screen within the edit mode:
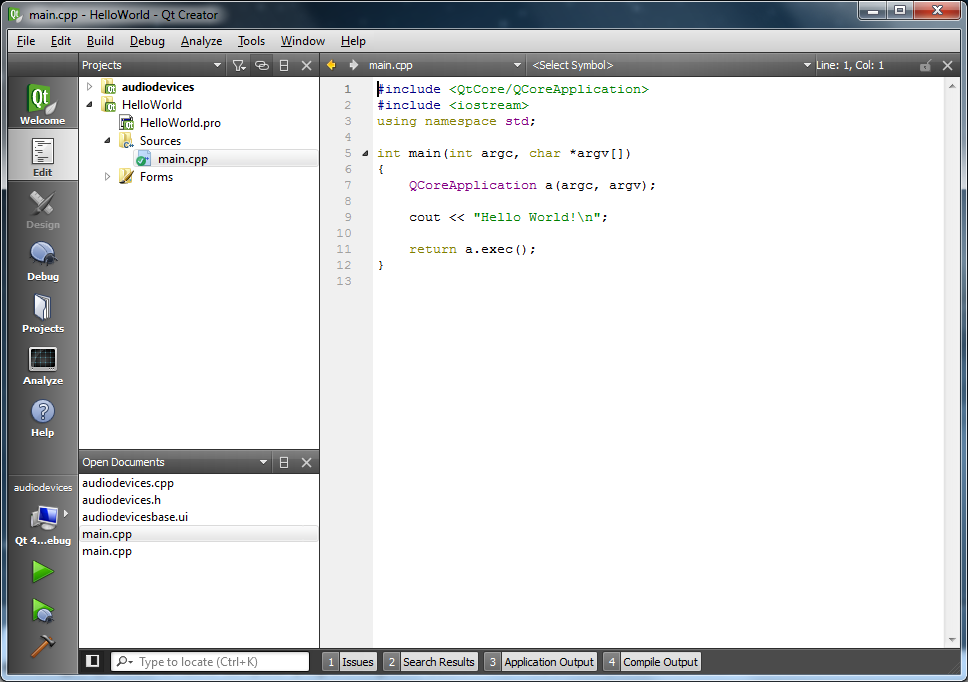
The default setting for the edit screen shows a split view with a sidebar showing a hierarchical list of all files in the current projects, a list with the currently opened documents (files) and a main edit view with the text of the current file.
With the different pop-up lists and buttons above the parts of this view you can either open additional list views in the sidebar on the left, change the display details or switch over to different views or files.
The Design mode
The design screen is the third mode option. This can only be selected if you have created a Qt Designer form or form class or a Qt Quick form within your project:
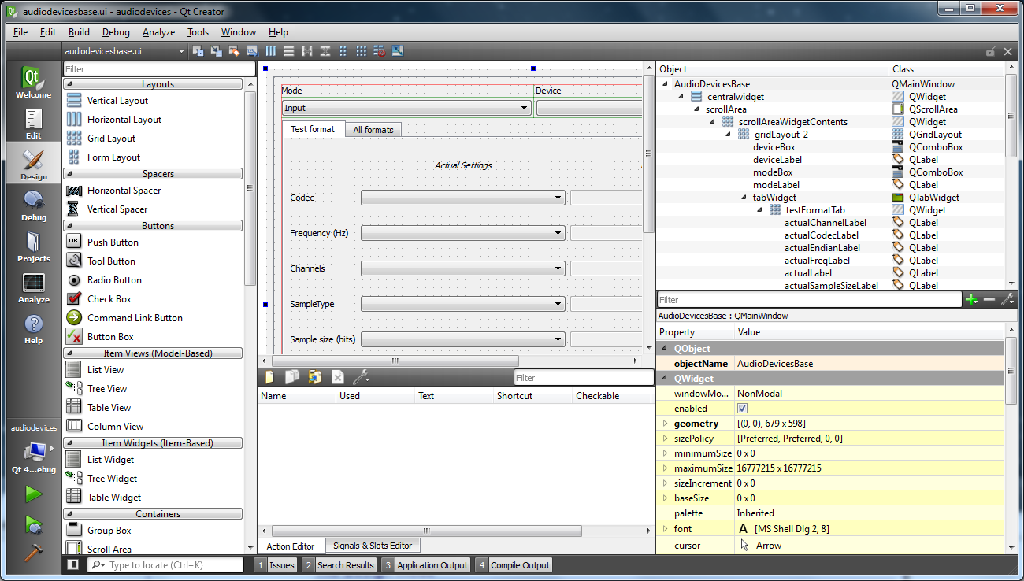
In the design screen you can change the appearance of your user interface forms by dragging and dropping interface elements on your form. Placement and resizing works just like in a vector oriented drawing program.
You can also change the names and properties of all objects which are part of your user interface form.
The design screen actually uses two slightly different graphical editors, one for normal Qt forms and another one for Qt Quick frontends. The basic usage is not much different though. You should be able to use both relatively easy if you have used programs like PowerPoint, Visio, Inkscape etc.
The Debug mode
Once you have selected a C or C++ source code file, the debug mode screen displays the file much like the edit screen:
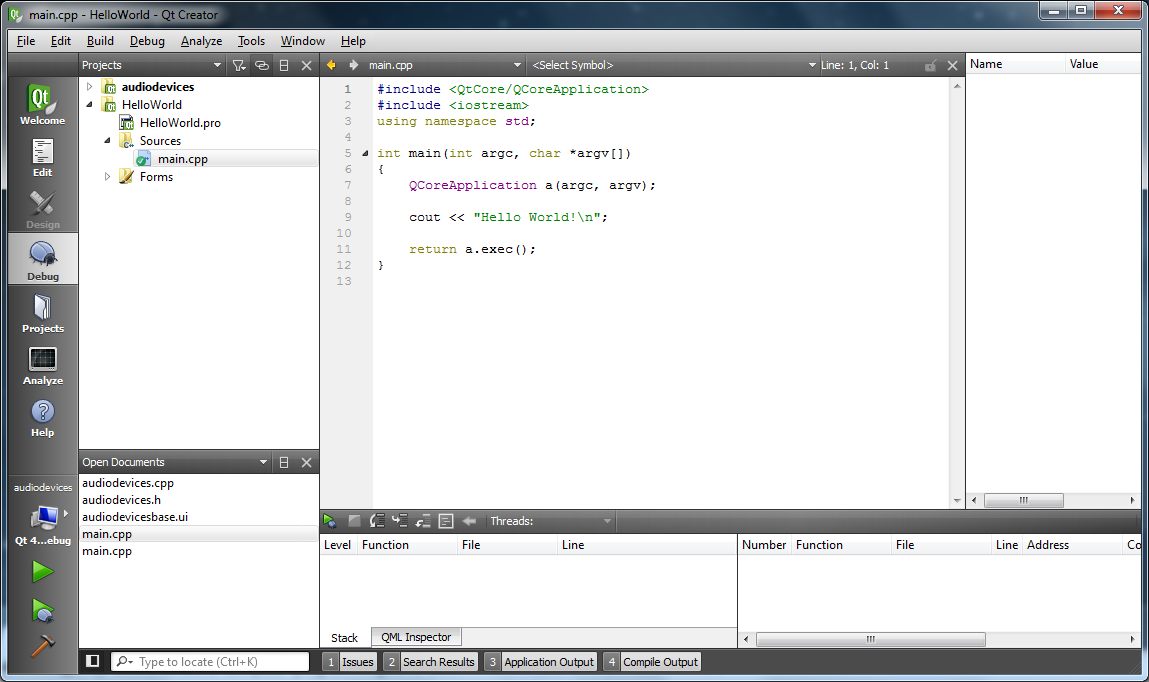
The code display is automatically split up into additional views which show selected variables with their values as well as currently set breakpoints, executed threads and memory snapshots.
This screen is automatically displayed if you have started the debug function in the Qt development environment.
The Projects mode
If you select the "Projects" mode button, you get a view with tabs for all currently opened projects:
Below each project name there is a horizontal bar where you can select further subscreens for different detail settings within the project:
Targets settings
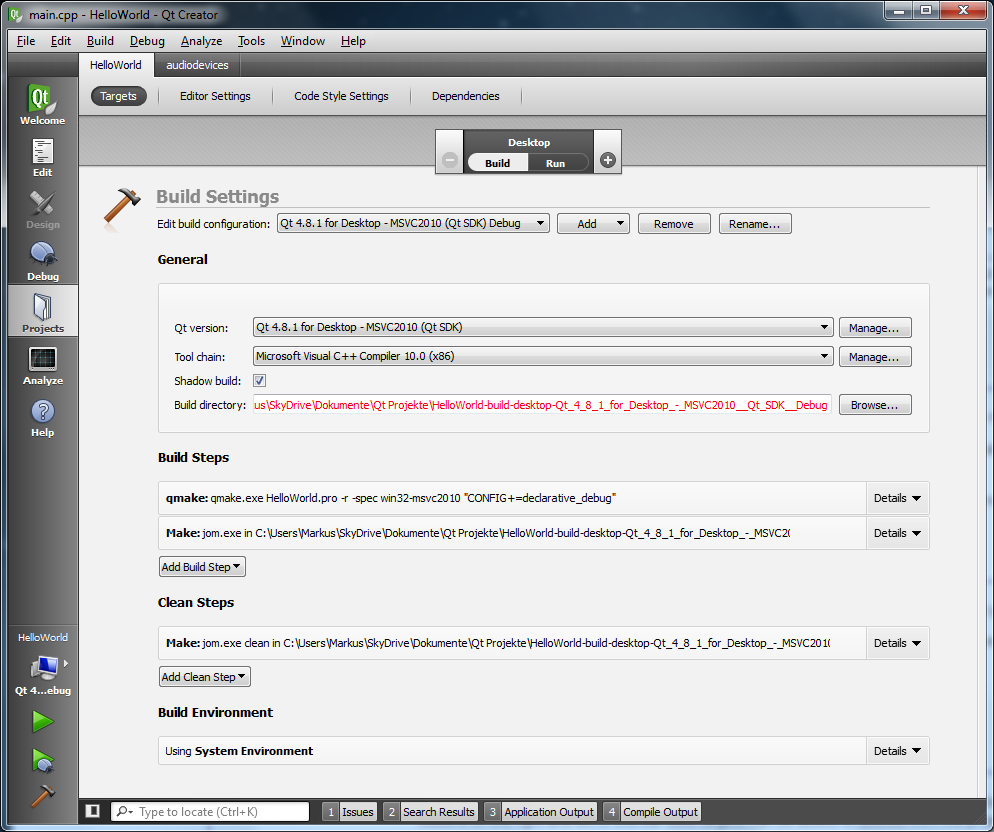
In the "Targets" screen there is central bar for all possible build targets. With the help of the plus and minus buttons on the right and left of this bar build targets can be added or deleted from the project.
For each target you can switch between the settings for building and running your projects applications.
The build options contain expert settings for different build configurations, C++ tools selection, additional build steps and more. You can also change the directory where the executable program is stored at the end of the build process.
In the run options screen, you can change the working directory for your project or manage additional steps for the deployment process of your project's application.
Editor settings
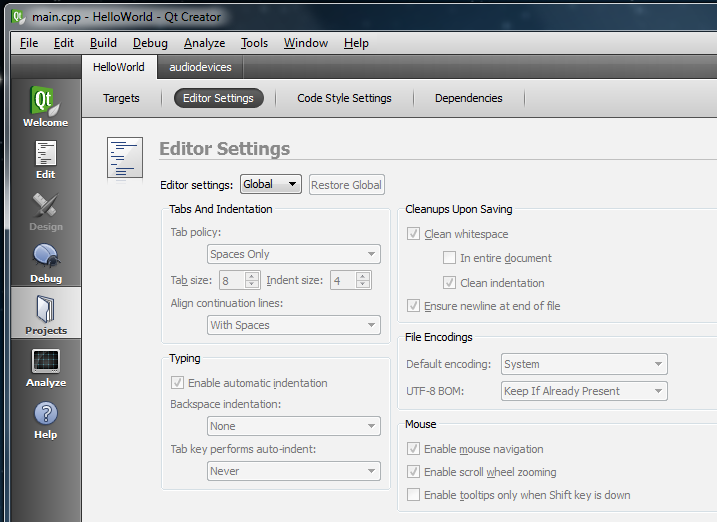
By default the editor settings of each project are set to use "Global" settings. This automatically applies all of the standard editor settings to your project.
If you change the global editor settings under the "Tools > Options > Text Editor" menu path, the changes are automatically applied to all projects which use the global settings.
Once you deactivate the "use global settings" option on this screen, you can change the detail settings for indentation, cleanup, file encoding and mouse behaviour.
Code Style settings
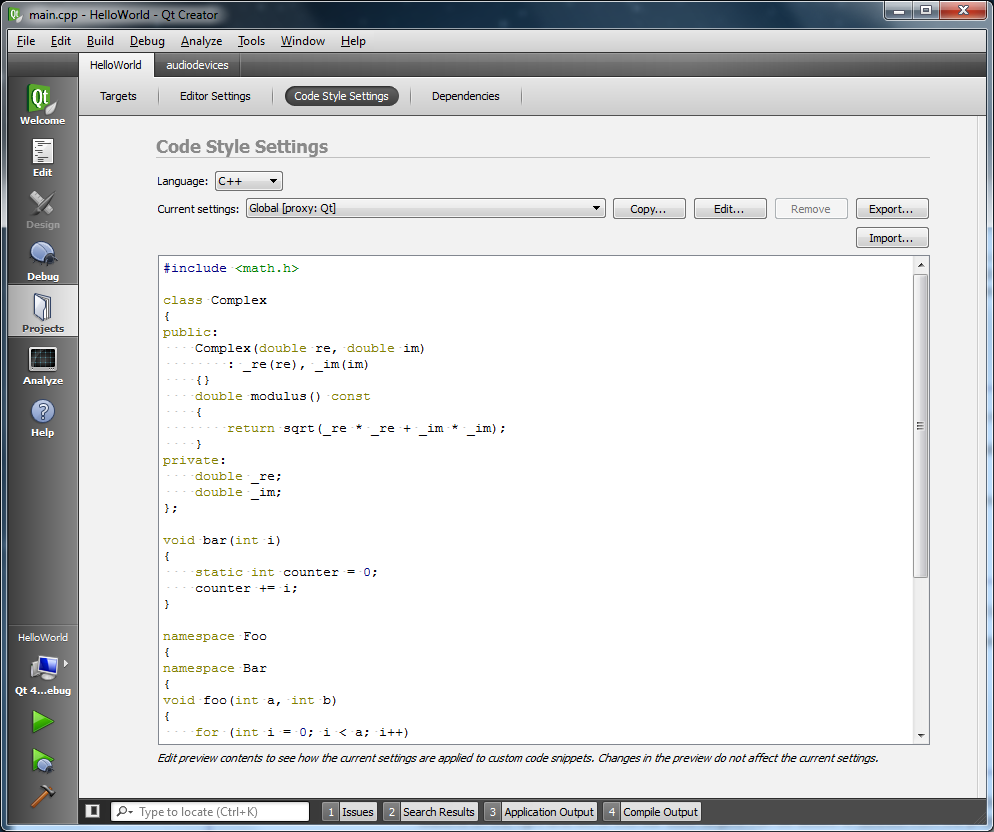
On the code style settings screen you can change the way in which the source code of the programs is displayed.
Just like other modern code editors, the code editor in the Qt Creator IDE uses automatic indentation and color highlighting of specific key words in order to make the code more easily readable for the developer. This is a helpful feature because simple syntax errors can be spotted already when the code is written.
It also makes the structure of the program more easy to see.
Dependencies settings
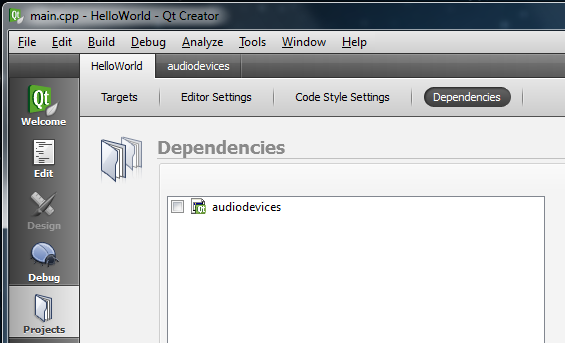
On the "Dependencies" screen you can see a list with all currently opened projects outside of the project for which you want to set the dependencies. If you have opened just one project, the list is empty.
In the project list, you can mark some or several of the other projects. This will tell the Qt Creator that your project depends on these other projects. The setting is saved in your current project.
This is normally used if you have separate projects for the development of classes and methods which you are going to use in several different development projects. If you are developing an application with a team of different programmers, this is an easy way to separately work on different parts of a programming project.
The Help mode
Finally, the help mode gives you access to the online documentation which is usually installed as a part of the Qt development environment installation. It can be opened manually or by using a help option or link from one of the other Qt Creator modes:
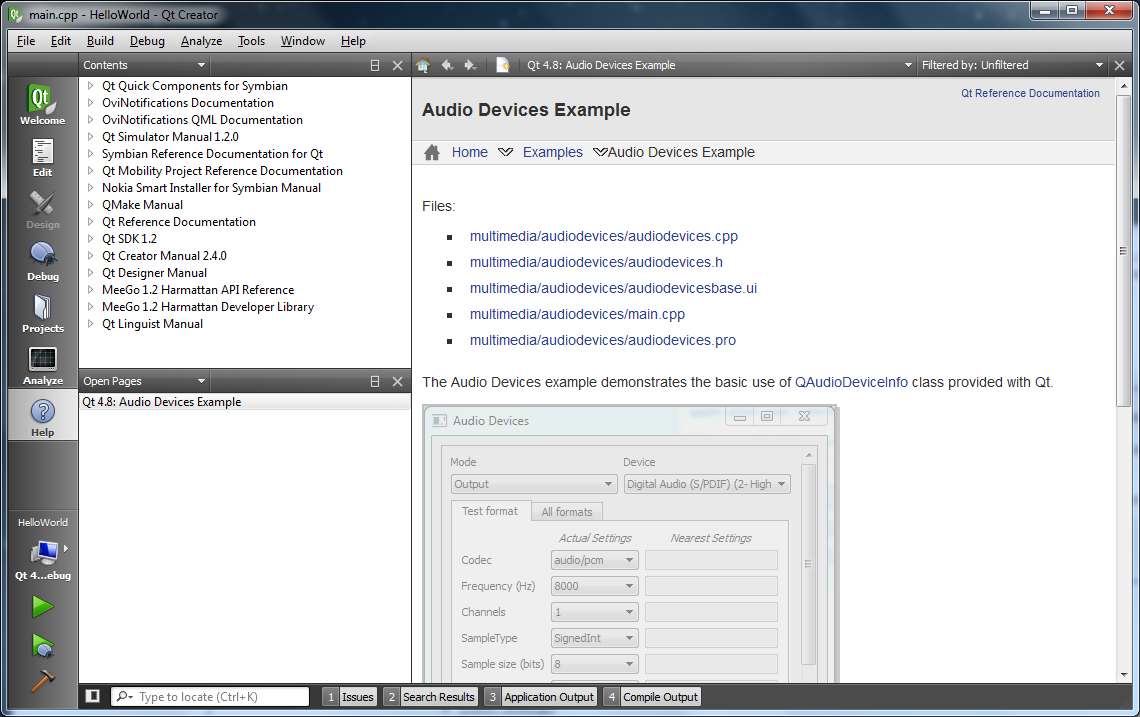
In the default setting, the help mode shows a sidebar with a content index tree and open pages list on the left and a main help view with the help text (and pictures) on the right.
With the pop-down menu bars in the sidebar (or the options in the main "Help" menu) you can switch between contents, index or bookmark list and a search option. The search option opens a search text field where you can enter keywords for the search in the help files.
Once you have opened a help page, you can set a bookmark for it using the bookmark button above the help text (or the appropriate key combination).
Just like in an internet browser, the main help display stores a history of all help files which you have opened in the current session. The navigation within these pages works just like in an internet browser.
Final words
You will get to know the different parts of the Qt Creator development environment better step by step when we start using it during the next parts of this programming tutorial.
I will be explaining things in more detail once we actually make use of the appropriate function.
So I hope you come back to the next part of this tutorial when we jump into actual programming.
- Home
- C++ with Qt Tutorial
- Introduction to Qt Creator